WordPress unleashed
Содержание:
- Customization and Flexibility
- Ending Thoughts
- Endure Web Studios
- Divi Den Pro White Label
- Theme Customizer
- How To Add A Shop Module To Your Page
- Divi Extras Modules
- Exporting Divi Library Items
- Authenticating Your Membership
- Navigation > Categories
- Why You Need a Divi Child Theme
- Subscribe To Download For Free
- A Homepage For Enterprise Businesses
- A Homepage For Design Agencies
- A Homepage For Local/Lifestyle Businesses
- The Countdown To Divi 3.0
- Shop Design Options
- Use Case Example: Adding an External Style Sheet to Animate Content on an Individual Page
- Divi Extras Layout Examples
- Site-Wide Post & Product Templates
- Divi Learndash Kit Modules
- Sunflower Creatives
- Importing and Exporting Divi Roles Settings
- Layout Settings
- Divi Switch Dashboard
- SEO > Index Page SEO
- Description
Customization and Flexibility
The ability to add premade layouts to kickstart the building of a new page opens up a world of flexibility for creating your own unique layouts. Once the layouts are deployed, you can edit them however you would like. For example, if you like a particular layout, but would rather not have a certain section, simply delete it by clicking on the trash can icon for that section and its gone!

And by replacing each element on the page with your own content you can have a beautiful, custom site in just minutes. With the visual builder making these changes is simple. Hover over any area you want to make changes to and the settings for it will appear. If you’d like to change text, simply select the text and start typing.

If you like the change you can hit “command + save” (or click the save button). If you don’t like the change you can hit “command + z” to undo it (or use the editing history button to roll back multiple actions all at once!).
To see more details on how to edit elements with the visual builder, see our post on getting started with the Divi Builder.
Ending Thoughts
The only downside I’ve seen is any layouts you create with these modules has to use the plugin, which limits your ability to distribute the layouts. The solution of course is for anyone using your layouts to purchase the plugin for their own use.
I’m a fan of magazine and blog design and Extra’s blog modules are some of my favorite modules to use with the Divi Builder. Having them for use in Divi opens up a ton of design possibilities. If you’re interested in designing magazine layouts in Divi, Divi Extras might be the plugin you’re looking for.
We want to hear from you. Have you tried Divi Extras? Let us know what you think about it in the comments.
Featured Image via venimo / shutterstock.com
Endure Web Studios

Based in the Australian capital of Canberra, Endure Web Studios has a full portfolio that covers a wide range of different types of sites, from blogs to ecommerce stores. This helps to give Endure Web Studios one of the most varied portfolios in our collection of Divi agencies so far.
The testimonials section of this Divi-powered agency website demonstrates that clients have been pleased with that they’ve received. Endure Web Studios has also found that their clients really appreciate how easy Divi makes updating their sites themselves, whether that’s adding new content or making tweaks to the design.
Sarah Oates from Endure Web Studios occasionally has to work with other themes but always comes back to Divi. The ability to assemble different pieces of this theme — Lego-style — and come up with unique designs every time, is one of the main draws of Divi. As part of their workflow, Endure Web Studios is another one of these Divi agencies that use the Library feature and Global Modules for increased efficiency.
Divi Den Pro White Label

The white label feature lets you add your own branding to the dashboard screen. It changes the plugin’s name, URL, icon, author name, author URL, description, and contact page. The white label feature is disabled by default. When choosing a name, keep in mind the name isn’t just a label. It’s also used as the URL for the settings screen. Be sure to use proper URL naming conventions (in other words, I don’t recommend using symbols).

Advanced settings let you enable features such as update notifications, hiding the name in the dashboard menu, hide the plugin panels in the customizer, and hide the premade layouts tab.
Theme Customizer

A new tab is added to the theme customizer called Divi Space Settings. Here, you’ll find another tab called Divi Switch. The theme customizer includes additional settings to create a custom icon for the mobile menu, change header background image, customize back to top button, and customize archive pages – all with live preview.

In this example, I’ve added a background image to the header. You can set it to repeat, change the image position, and change the image size. Above this setting is a selection area where you can choose an icon for the mobile menu.

In this example, I’m adjusting the back to top button to match the layout. You can adjust the icon size, radius, position, background color, icon color, and hover colors.

In this example, I’m adjusting the separator color, height, and width for the archive pages. You’ll also notice in these examples that the logo changed when I scrolled down. I still have the logo swap setting activated (well, I guess it’s actually ‘switched’.)
How To Add A Shop Module To Your Page
Before you can add a shop module to your page, you will first need to jump into the Divi Builder. Once the Divi Theme has been installed on your website, you will notice a Use Divi Builder button above the post editor every time you are building a new page. Clicking this button will enable the Divi Builder, giving you access to all of the Divi Builder’s modules. Next, click the Use Visual Builder button to launch the builder in Visual Mode. You can also click the Use Visual Builder button when browsing your website on the front end if you are logged in to your WordPress Dashboard.

Once you have entered the Visual Builder, you can click the gray plus button to add a new module to your page. New modules can only be added inside of Rows. If you are starting a new page, don’t forget to add a row to your page first. We have some great tutorials about how to use Divi’s row and section elements.
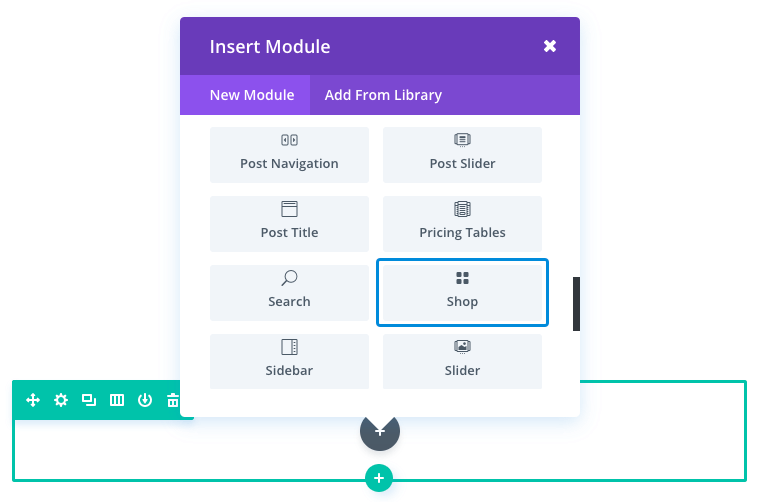
Locate the shop module within the list of modules and click it to add it to your page. The module list is searchable, which means you can also type the word “shop” and then click enter to automatically find and add the shop module! Once the module has been added, you will be greeted with the module’s list of options. These options are separated into three main groups: Content, Design and Advanced.
Divi Extras Modules
Here’s a look at the individual modules in Divi to give you an idea of what they do. I didn’t include the Ads module because I wanted to focus on the blog modules and we know what ads look like.
Masonry Blog Feed Module

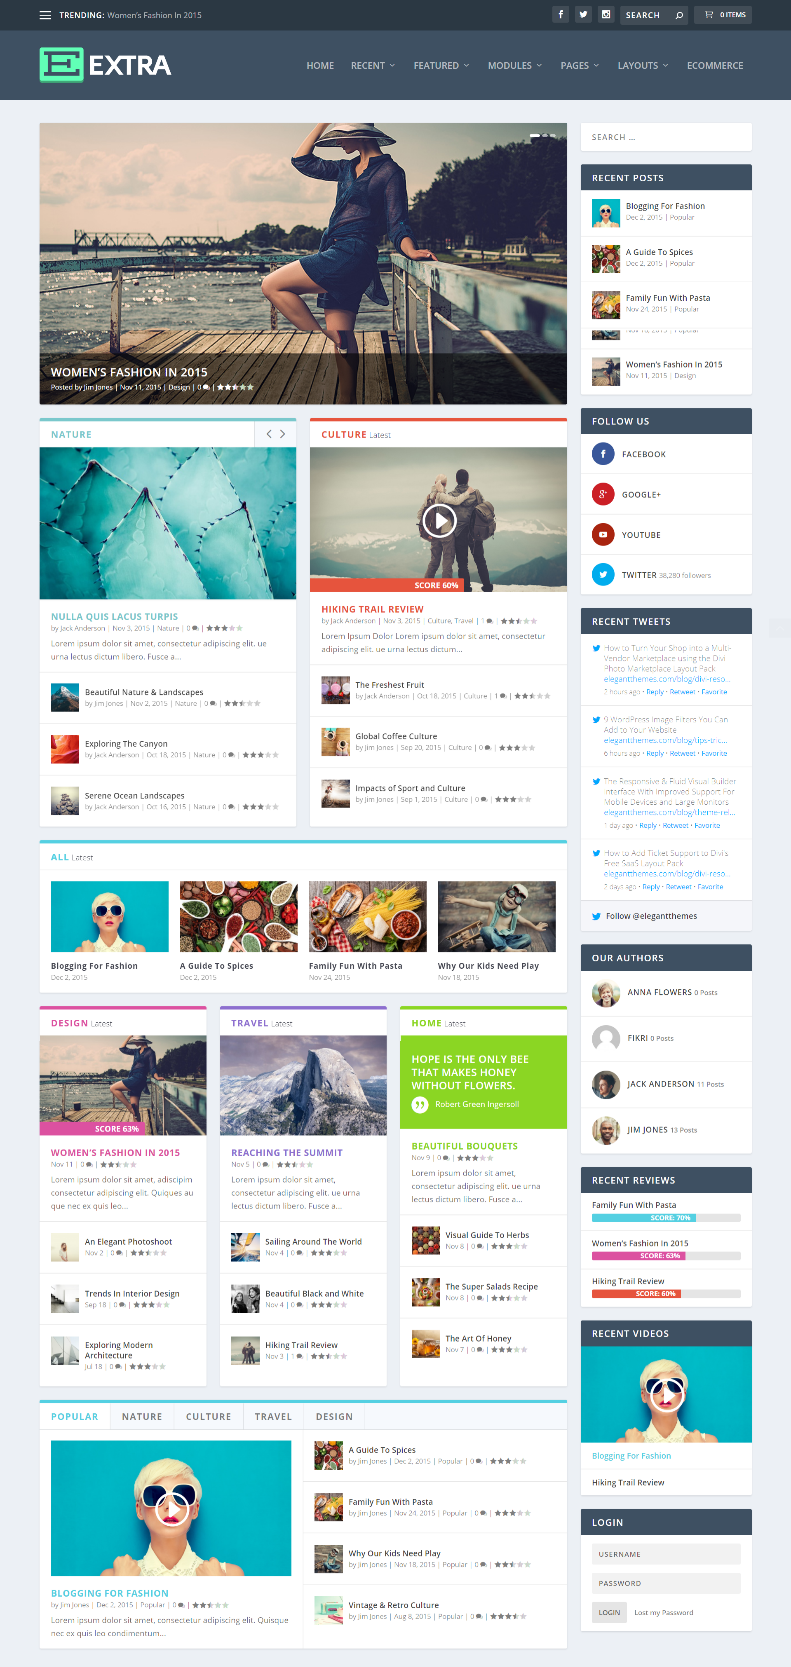
This one uses the Masonry Blog Feed module. Even though the review system isn’t available within Divi, since I had added a review to the most recent article (when writing an article about Extra) it still displays the overall score like it does within Extra.

For comparison, here’s the same page in Extra. This is a normal page and not a Category page. The only difference between the way Divi and Extra display the module is the colors for the title and score.

This is the Blog Feed Standard module. It includes the line across the top. This is one of my favorite blog designs.

Here’s the Featured Posts Slider. It includes some nice title styling.
Posts Module

The Posts module creates a nice magazine-style layout. You can sort them by recent, popular, or highest rated. I’ve seen lots of designs that include two or three of these modules side-by-side with either different categories or different sorting.

This is the Posts Carousel module. It creates a slider that displays multiple posts at the same time.
Tabbed Posts Module

This is the Tabbed Posts module. It works the same as the Posts module but adds tabs for different categories, allowing you to display dozens of posts in the same space.
Exporting Divi Library Items
The Divi Library is a powerful tool for web designers, as it allows you to build and categorize custom designs that you can use to jump-start your future projects. Using the portability system, these custom designs can now be easily transfered between websites and shared with your peers. To export Divi Library items, you will first need to navigate to the Divi > Divi Library page in your WordPress Dashboard. Here you will see a list of all of your Divi Library items, along with an “Import & Export” button at the top of the screen. Clicking this button will launch the portability popup.

From within this popup, while inside the “Export” tab, you can click the “Export Divi Builder Layouts” button to begin exporting your entire Divi Library. You can also choose a name for your export file. Exporting large library collections, especially those that contain high resolution photos, can take some time. It’s recommend to export your library into moderately-sized collections.

If you have a very large library, you may want to pick and choose individual items to export instead of exporting everything at once. Divi allows you to select individual items to export. To do this, close the portability popup and, within your list of library items, select the items that you would like to export.

Click the “Import & Export” once again to launch the portability popup. Before exporting, select the “Only export selected items” check box. Now Divi will only export the items that you have previously selected from your Divi Library.

After the export process has completed, your browser will automatically download a .JSON file. This file can be used to import your exported items onto a new website using the “Import” tab inside the portability popup.
Authenticating Your Membership
Before you can update your theme or plugin, you must first authenticate your Elegant Themes subscription. Only members with active accounts have access to product updates. To authenticate your account, you will be asked to input two pieces of information into your theme or plugin settings panel: 1) Your Username and 2) Your API Key. Your username is the same username you use when logging in to your ElegantThemes.com account, and your API Key is a unique identifier used to authenticate your account that is only available to you when logging in. To locate your API Key, log in to the Elegant Themes members area and click on the Account > Your API Key link. Copy the API Key displayed on the page. You will by pasting this key into your Theme or Plugin options page.
Once you have copied your API Key, you will need to use it to authenticate your account by pasting it into your theme or plugin options page. Log in to your website’s WordPress Dashboard and navigate to your theme or plugin options page. For Divi, this can be found by clicking the Divi > Theme Options link.

Once you have loaded your theme or plugin options page, look for the Updates tab. Click the Updates tab to reveal the Username and API Key fields. Type your username into the Username field and paste the API Key you copied earlier into the API Key field. You should confirm that you have not copied any extra white spaces by mistake. Click save to complete the account authorization.

Once you have entered your credentials, you are now ready to update your theme. Click on the Dashboard > Updates tab and update your theme or plugin normally using the WordPress update interface. If you do not see any update notifications, or you receive an authentication error when updating, try waiting a bit and then check back later. Sometimes WordPress will cache update notifications and it can take some time for them to appear correctly.

All of your existing categories will appear in this window. Every new category will appear in your navigation by default. You can uncheck any category page here if you wish to not display a specific category or categories.
Hide Empty Categories
If a category has been made but is not being used by any posts, you can choose whether or not to display it in your navigation. By default empty categories are hidden.
Number of Dropdown Tiers Shown
This options allows you to control how many tiers your page’s dropdown menu has. Increasing the number allows for additional menu items to be shown.
Why You Need a Divi Child Theme

Divi is a WordPress theme. Whenever you need to make modifications to any WordPress theme, it is best practice to create a child theme that inherits the design and functionality of that parent theme. One important reason to create a child theme is to preserve the modifications you make when updating the parent theme. Whenever you update Divi, all of the theme files are updated so if you have made any changes to these files, those changes will be erased. So, instead of modifying Divi’s theme files directly, you can create additional theme files within a child theme so that when Divi is updated, those child theme files remain unchanged. Therefore, if you plan on making advanced customizations to your theme like modifying page templates and/or adding large amounts of CSS/JavaScript, and/or adding new functions, it is best to make these changes to your child theme without ever having to touch the parent theme files.
Subscribe To Download For Free
Download The Layout Pack
All photos courtesy of the generous authors on Unsplash.com via the Unsplash License. Layout Packs are released under the GPL, which means you can use them for free for both personal and commercial projects! By using ElegantThemes.com and our products you agree to our Terms of Service.
A Homepage For Enterprise Businesses
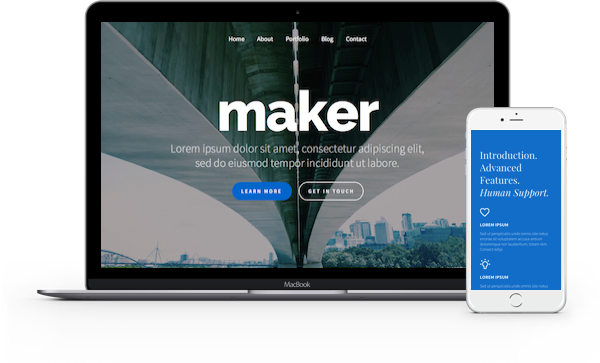
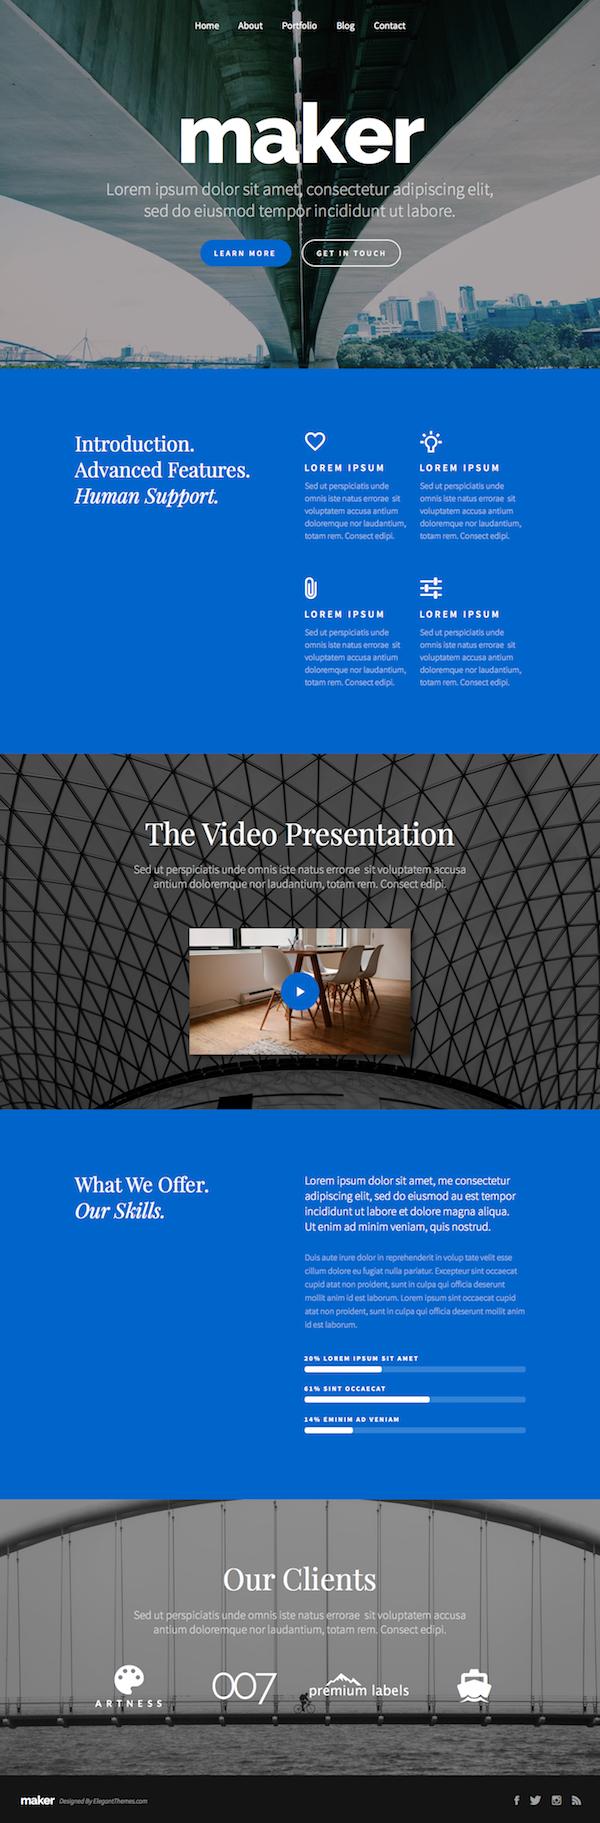
The first homepage design focuses on enterprise businesses. The colors are a combination of professional and and neutral blues and grays, combined with matching images that imbue that “big city” business vibe. The layout includes an attention-grabbing call to action above the fold, followed by a classic grid of icon/content blocks. Below that you will find the perfect place for an “about us” video, followed by company stats and the ever-present logo reel. No homepage is complete without a little social proof!
A Homepage For Design Agencies
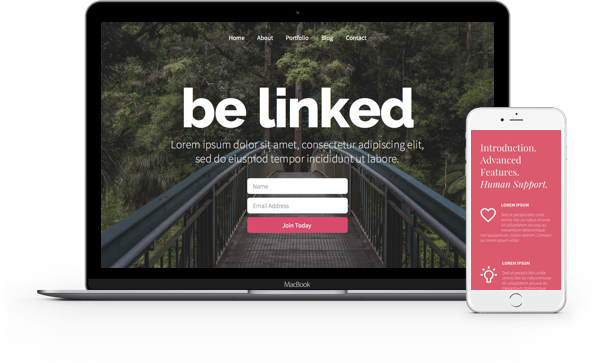
The second layout in the collection focuses on the needs of art studios, photographers and design agencies. This homepage is a bit more fun and vibrant, featuring organic visuals and complimentary colors of pink and green. The call to action at the top of the page includes a contact form so that you can quickly grab leads. Farther down the page you will find a custom gallery built using gutterless/full-width rows. If you have been thinking about re-designing your own web design agency’s website, this might be a good way to kick things off!

A Homepage For Local/Lifestyle Businesses
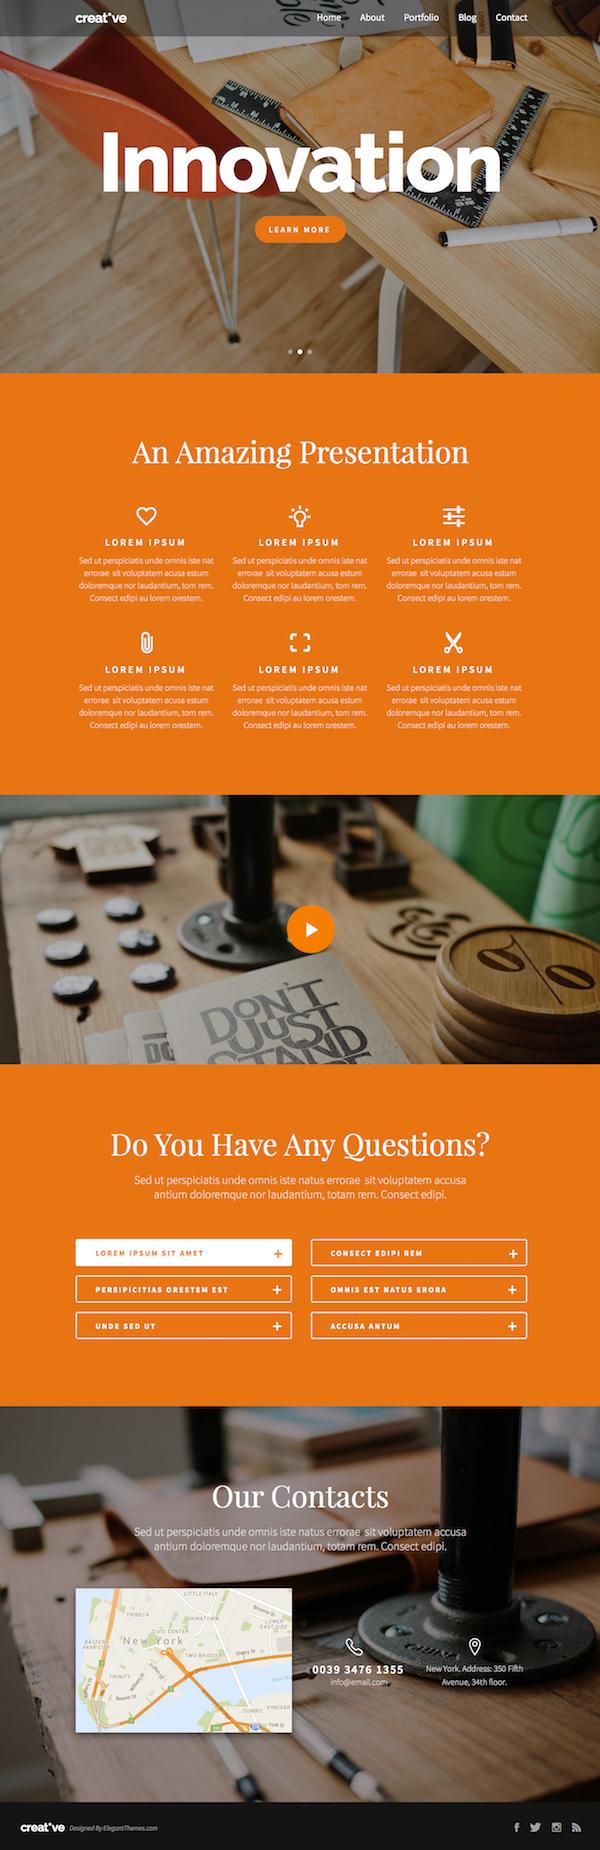
The third design focuses on local lifestyle businesses. Here you will find warm and welcoming colors of orange and yellow. At the bottom of the page, a map module and custom text modules have been used to create the perfect “about us” section for local businesses. The chances are, if a visitor has stumbled upon a local business’s website, they are probably looking for location/contact details! We have also added a custom FAQ section built using the toggle module.

The Countdown To Divi 3.0
This post is part of our Divi 100 marathon. Follow along as we post free Divi resources for 100 days in a row! This 100-day countdown will end with the game-changing release of Divi 3.0, including our brand new visual editor built from the ground up using React. Divi 3.0 will change the way you build websites with the Divi Builder forever! Let the countdown begin.
Shop Design Options
Within the design tab you will find all of the module’s styling options, such as fonts, colors, sizing and spacing. This is the tab you will use to change how your module looks. Every Divi module has a long list of design settings that you can use to change just about anything.
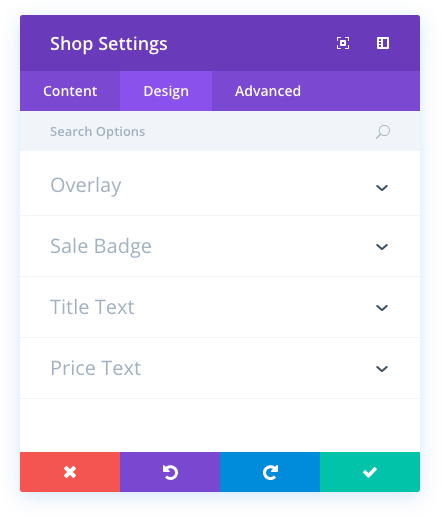
Icon Hover Color
When hovering over an item within the shop module, an overlay icon appears. You can adjust the color that is used for this icon using the color picker in this setting.
Hover Overlay Color
When hovering over an item within the shop module, an overlay color fades in on top of the image and below the shop’s title text and icon. By default, a semi-transparent white color is used. If you would like to use a different color, you can adjust the color using the color picker in this setting
Sales Badge Color
When an item is on sale, a sales badge appears over the product image. Using this setting, you can adjust the color that is used for the badge’s background.
Title Font
You can change the font of your title text by selecting your desired font from the dropdown menu. Divi comes with dozens of great fonts powered by Google Fonts. By default, Divi uses the Open Sans font for all text on your page. You can also customize the style of your text using the bold, italic, all-caps and underline options.
Title Font Size
Here you can adjust the size of your title text. You can drag the range slider to increase or decrease the size of your text, or you can input your desired text size value directly into the input field to the right of the slider. The input fields supports different units of measurement, which means you can input “px” or “em” following your size value to change its unit type.
Title Text Color
By default, all text colors in Divi will appear as white or dark gray. If you would like to change the color of your title text, choose your desired color from the color picker using this option.
Title Letter Spacing
Letter spacing affects the space between each letter. If you would like to increase the space between each letter in your title text, use the range slider to adjust the space or input your desired spacing size into the input field to the right of the slider. The input fields supports different units of measurement, which means you can input “px” or “em” following your size value to change its unit type.
Title Line Height
Line height affects the space between each line of your title text If you would like to increase the space between each line, use the range slider to adjust the space or input your desired spacing size into the input field to the right of the slider. The input fields supports different units of measurement, which means you can input “px” or “em” following your size value to change its unit type.
Price Font
You can change the font of your price text by selecting your desired font from the dropdown menu. Divi comes with dozens of great fonts powered by Google Fonts. By default, Divi uses the Open Sans font for all text on your page. You can also customize the style of your text using the bold, italic, all-caps and underline options.
Price Font Size
Here you can adjust the size of your price text. You can drag the range slider to increase or decrease the size of your text, or you can input your desired text size value directly into the input field to the right of the slider. The input fields supports different units of measurement, which means you can input “px” or “em” following your size value to change its unit type.
Price Text Color
By default, all text colors in Divi will appear as white or dark gray. If you would like to change the color of your price text, choose your desired color from the color picker using this option.
Price Letter Spacing
Letter spacing affects the space between each letter. If you would like to increase the space between each letter in your price text, use the range slider to adjust the space or input your desired spacing size into the input field to the right of the slider. The input fields supports different units of measurement, which means you can input “px” or “em” following your size value to change its unit type.
Price Line Height
Line height affects the space between each line of your price text If you would like to increase the space between each line, use the range slider to adjust the space or input your desired spacing size into the input field to the right of the slider. The input fields supports different units of measurement, which means you can input “px” or “em” following your size value to change its unit type.
Use Case Example: Adding an External Style Sheet to Animate Content on an Individual Page
In this example, I’m going to add a link script to import Animate.css in order to add animation effects to the elements on the page. Since the Animate.css file has a lot of code, it makes sense to load it only on the page that I need it.
Simply add a Regular Section and a fullwidth (1 column) row and add the Code Module.

In the content text box, add the code snippet.

Now, all you have to do is add a few CSS classes to animate any element of your page of CSS classes to your page. In this example, I’m going to make the button bounce when loading the page.
In the Button Module Settings, under the Advanced tab, enter the two clases “animated” and “bounce” into the CSS Class text box.

Now the button will bounce when loading the page.

Here are a few more examples of how you can use the code module:
- Add javascript code blocks or libraries that you only what applied to your page.
- Integrate third party plugins like the revolution slider.
- You can use the Fullwidth Code Module to embed a Typeform for more interactive questionnaires, contact forms, etc…
- Add a floating action menu
- Create a slide-in top bar ad.
- Add a floating action button.
Tip: Sometimes adding code with line breaks will cause the code not to work. It is best to create your code in a text editor and concat it (make it all on one line) before pasting it in the Code Module.
Divi Extras Layout Examples
Here are a few examples based on the pre-defined layouts from the Category Builder. I re-created them by hand within Divi pages.
Magazine Layout
For my first example I wanted to duplicate the standard Extra layout. It displays a Featured Posts slider in one column, two post sliders in 2 columns, a Posts Carousel in one column, 3 Posts modules in 3 columns to display the latest posts in three different categories, and a Tabbed Posts module in one column.

I created the layout in the standard Divi Builder with the modules from Extra. This layout comes with the Extra Category Builder as a pre-defined magazine layout. I’ve recreated it here by hand.
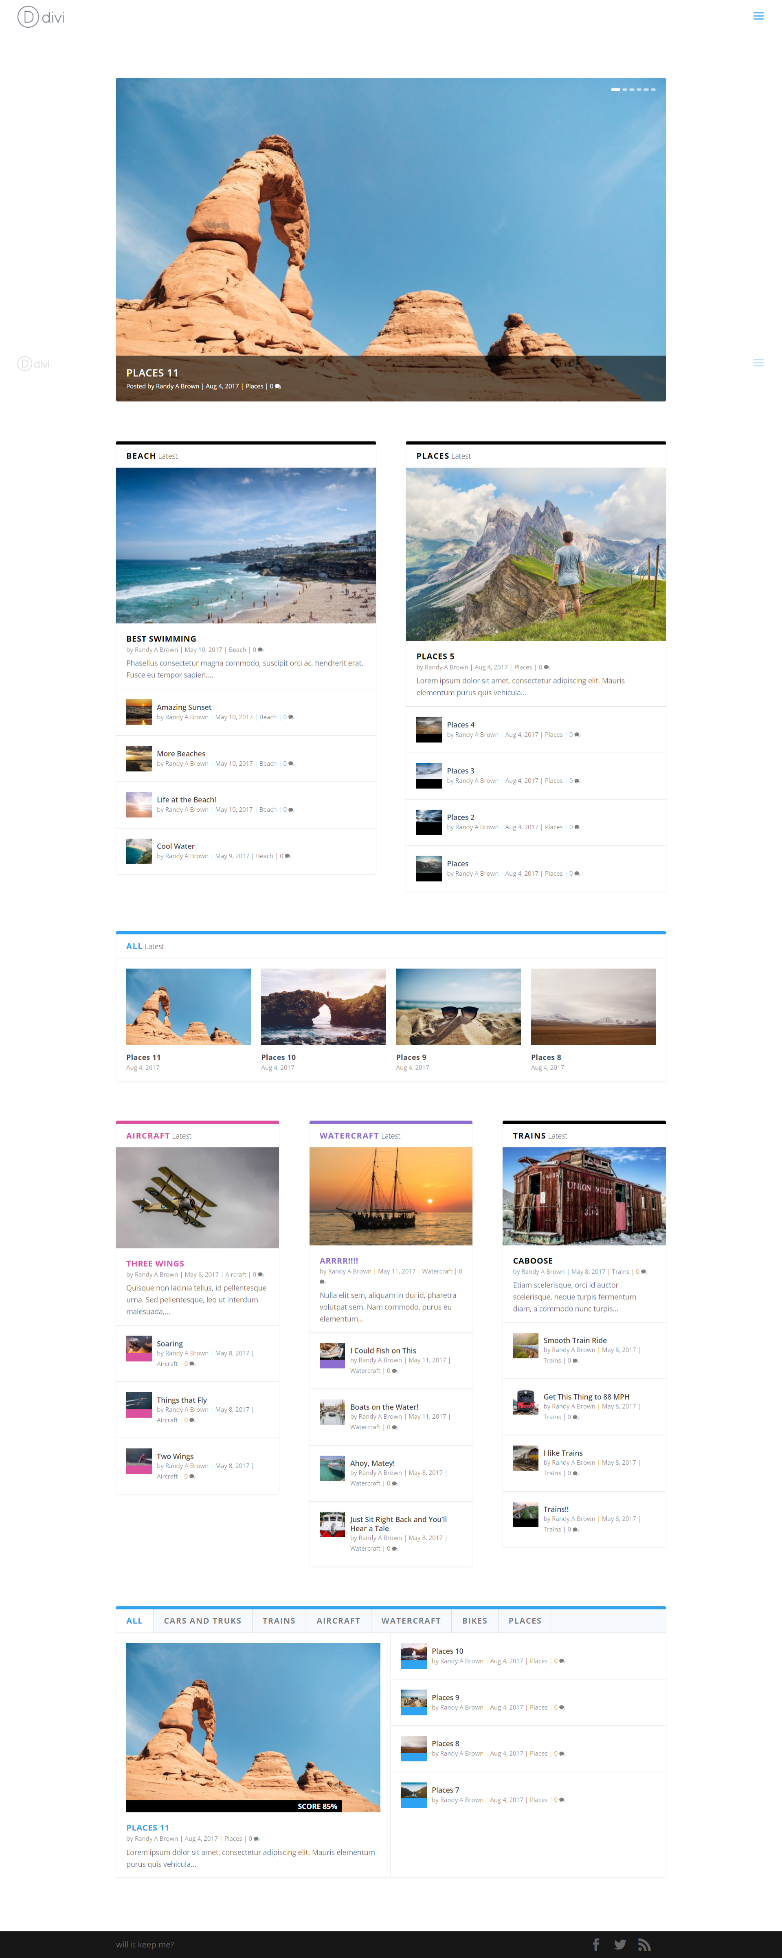
It gives me the exact layout I wanted. I used full-screen with no sidebar and I didn’t add the navigation to the first Posts module, but the layout itself is the same.
Masonry Blog

This one uses the Featured Posts Slider and Blog Feed Masonry modules.

It provides a nice masonry blog layout with featured post. I limited the posts to 3 and set it to ignore posts that already display on the screen. This allows the masonry blog to ignore any posts in the featured post module so I don’t have duplicate posts on screen.
Standard Blog

Standard Blog uses the Featured Posts Slider and the Blog Feed Standard modules.

It displays the standard blog feed with the posts stacked. I’ve set the display settings the same as the previous example.
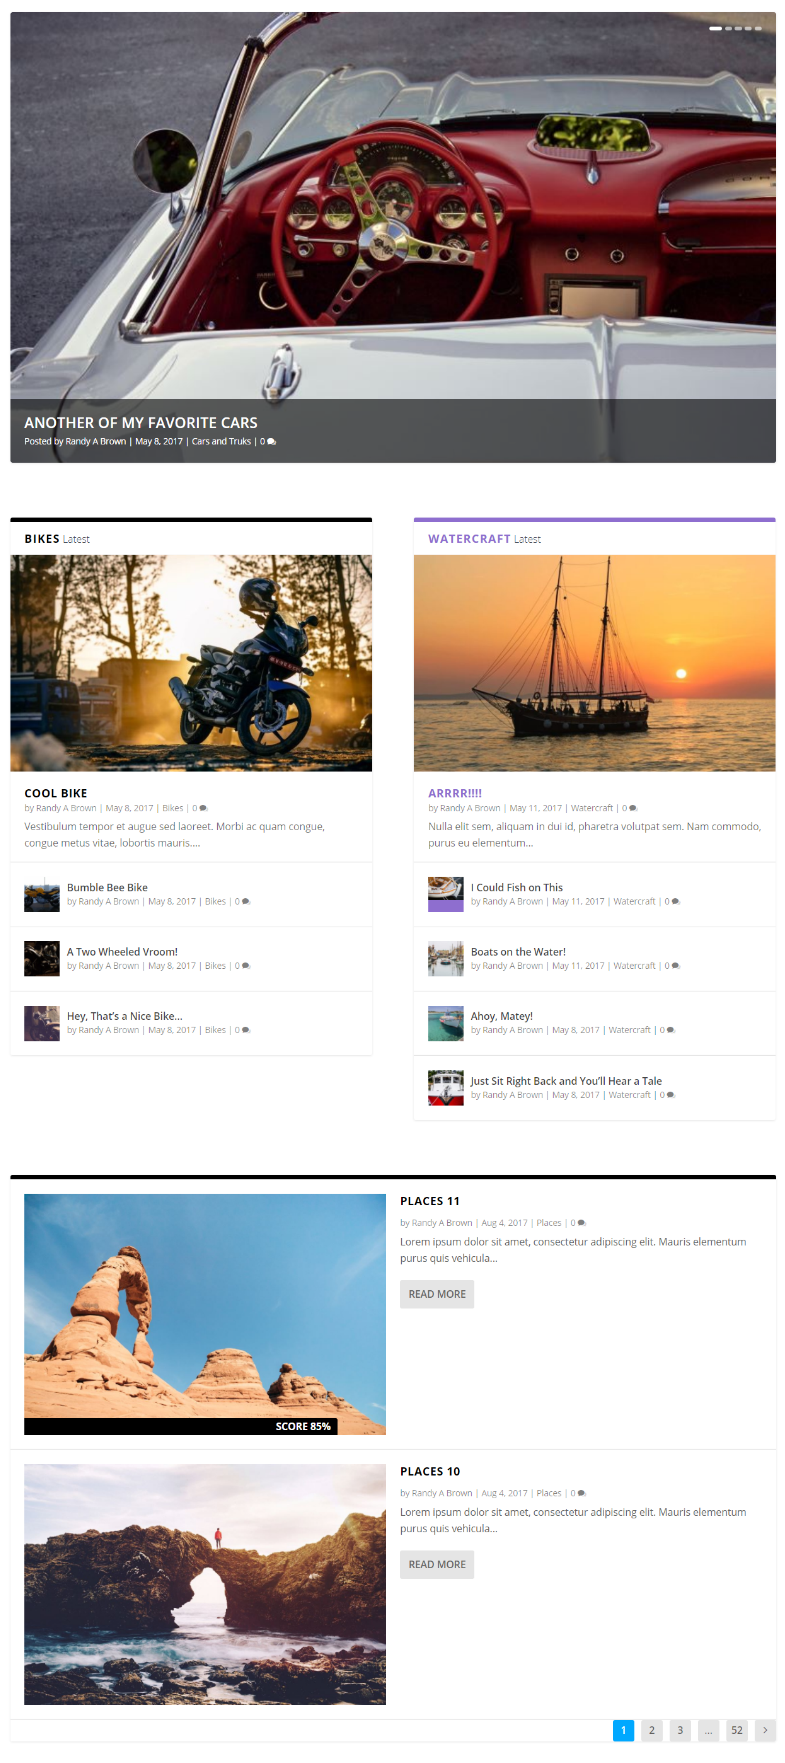
Masonry Blog Homepage

This one uses the Featured Posts Slider, three different Posts modules, and Blog Feed Masonry.

This created a nice magazine-style layout that could feature categories. I didn’t have enough demo content to ignore posts that were already displaying on screen, but this should give you an idea of what you can do with this design.
Standard Blog Homepage

The Standard Blog Homepage layout uses the Featured Posts Slider, two Posts, and Blog Feed Standard modules.
This creates a nice magazine design with a couple of different ways to present your articles.
Site-Wide Post & Product Templates
The Theme Builder also allows you to create custom body templates that change the default structure of your posts, products or any other post type across your website. Instead of editing each post and product individually, you can use the Theme Builder to create a site-wide template. Dynamic content can be assigned to Divi modules within these templates to showcase the current post’s information, such as its title, content and featured image anywhere within your custom design, and you can use Divi’s WooCommerce Modules to create completely custom product templates. Edit them once and see your entire website change instantly. Check out some custom product templates we created to give you some inspiration!
Custom Product Demo 1Custom Product Demo 2Custom Product Demo 3
Divi Learndash Kit Modules

Adding the Divi Builder to the Learndash custom post type is helpful, but Divi Learndash Kit goes further by adding 13 modules to the Divi Builder:
- Course Content – a table showing the content of the course
- Course Expire Status – shows the expiration date of the course
- Course Info – shows information about the courses available to the user
- Course List – shows the list of courses
- Course Progress – displays a progress bar, showing the progress the user has made through the course
- Lesson List – shows the list of lessons
- Payment Buttons – displays buttons where the user can make a payment
- Profile – displays the user’s profile
- Quiz List – shows the list of quizzes
- Topic List – shows the list of topics
- User Course Points – shows points the user has earned
- User Groups – shows a list of groups the user is assigned to
- Video – shows a list of courses with video
The modules allow you to create your own layouts using the LearnDash elements without having to use Learndash shortcodes for those elements. They’re labeled well and are easy to find.
Note – the modules do not work in the Visual Builder.

The modules include all the customizations you expect. Content, Design, and Advanced tabs include settings for backgrounds, text, border, shadow, animation, spacing, CSS, etc. They also include selections for the number of columns to display, the number of items to display, filters for categories, tags, etc. Of course this depends on the type of content the module displays.
Sunflower Creatives
Sunflower Creatives produces websites for clients that help them get the attention and leads they deserve. All projects are completed using the Divi theme, and in addition to custom web design services, there are a number of commercial Divi child themes available at the Sunflower Child Themes website.
Tammy Grant at Sunflower Creatives has really embraced Divi and its many features. This means she now works smarter, not harder, and can deliver better projects for her clients. As part of her workflow, Tammy uses the Divi Library to save elements and pages for reuse throughout projects.
Divi also makes it easier for clients to choose which design option they prefer from a range of choices. The drag-and-drop interface of Divi Builder now makes fulfilling client requests, such as changing the order of sections on a page, a breeze.
Sunflower Creatives is a great example of a diversified online business built around Divi, with both bespoke services and off-the-shelf products available to their clients.
Importing and Exporting Divi Roles Settings
If you would like to export the Role Settings for your site, first navigate to the Divi > Role Editor page in your WordPress Dashboard. Once you have saved your role settings how you want them, click the portability icon above the Role Settings. This will launch the portability system where you can export your current Role settings. Alternatively, if you have a previously-exported Role Settings .JSON file, you can choose to import those settings here.

The ability to import and export Divi Role Settings comes in handy when you have certain settings that you want to duplicate for other websites. With a few clicks, you can have your role settings in place.
Layout Settings
The layouts panel is where you can adjust various sizing and spacing options for your website. Here you can increase or reduce spacing between columns, rows and sections, and adjust the size of your sidebar. You can also enable “Boxed Layout” mode from within this panel.

ENABLE BOXED LAYOUT
Here you can change your site into a box layout which frames the content of your site and exposes a background that can be customized.
WEBSITE CONTENT WIDTH
This is where you can set the max width of your content section. Since your content is on a responsive layout, it will adjust to smaller sizes but will not expand any wider than the max width set here.
The default is set to 1080px. This is a good width for most standard laptops and desktops.
WEBSITE GUTTER WIDTH
Gutter width corresponds to the amount of horizontal space (margin) between the columns in each row.
Optional values for gutter width range from 1 to 4.
1 represents zero margin between columns.
2 represents a 3% right margin between columns.
3 represents a 5.5% right margin between columns.
4 represents a 8% right margin between columns.
USE CUSTOM SIDEBAR WIDTH
This sets the default sidebar width for your theme. This applies to all pages on your theme that have a sidebar and are not built using the Divi Builder.
THEME ACCENT COLOR
Before you start changing the colors for your other elements, you should change this first. Once you change it, save & publish your settings and refresh your page. Now the updated Theme Accent Color should have populated other elements automatically.
Divi Switch Dashboard

Divi Switch has been redesigned and all settings have been moved from its separate place in the admin menu to the Divi Theme Options Page. The switches themselves are distributed in the sub-tabs under the new “Divi Switch” tab in the Divi Theme options.

Each toggle has a title, short description and a shadowed out switch set by default to “Disabled”. If you want to activate the effect, just click on the switch and it’ll toggle to “enabled”. It will turn blue to indicate that it’s activated.

To see the description of the features, select the question mark that appears on the right when you hover over the effect.
Let’s look at several tabs and see what it can do.
SEO > Index Page SEO

Enable canonical URL’s
Canonicalization helps to prevent the indexing of duplicate content by search engines, and as a result, may help avoid duplicate content penalties and pagerank degradation. Some pages may have different URL’s all leading to the same place. For example domain.com, domain.com/index.html, and www.domain.com are all different URLs leading to your homepage. From a search engine’s perspective these duplicate URLs, which also occur often due to custom permalinks, may be treaded individually instead of as a single destination. Defining a canonical URL tells the search engine which URL you would like to use officially. The theme bases its canonical URLs off your permalinks and the domain name defined in the settings tab of wp-admin.
Enable meta descriptions
Check this box if you want to display meta descriptions on category/archive pages. The description is based off the category description you choose when creating/editing your category in wp-admin.
Choose title autogeneration method
Here you can choose how your titles on index pages are generated. You can change which order your blog name and index title are displayed, or you can remove the blog name from the title completely.
Define a character to separate BlogName and Post title
Here you can change which character separates your blog title and index page name when using autogenerated post titles. Common values are | or –
Description
This plugin fixes and adds some useful modifications to the Divi Theme by Elegant Themes. This is a very lightweight plugin with minified css to reduce the loading time as low as possible.
Surbma – Divi Extras plugin features:
Featured menu style, as seen here in the menu: Monarch plugin demo
If you want to have a menu item with a colored background, that really shines in your menu bar, just add the class to your menu item. The best part of it is, that the background color will be the same, what you have set as the Accent Color in the Customizer. Wow!
Once you install and activate the plugin, go to Appearance > Menu and expand the “Screen Options” drop down menu in the upper right corner. Select “CSS Classes” and finally, add in the class field and you’re good to go!
Vertical center
A simple class for vertically center the text in a module. If you want to center your modules vertically in a column, you can use the class for the column class. So you have to add it in the row settings. The class is using flex, so it will only work with modern browsers.
Logo fix
Logo width fix for mobile view. If you don’t use the search function, the logo will be bigger, as it has more space in the header.
Comment fix
Hide comment allowed tags block. It is automatically displayed by default, but this function will hide it, as this block is unnecessary for most users.
This plugin is a Divi extension
You have to buy the Divi Theme to use this plugin:
Divi by Elegant Themes (affiliate link)
My plugins for Divi theme:
- Surbma | Divi & Gravity Forms
- Surbma | Divi Extras
- Surbma | Divi Lightbox
- Surbma | Divi Project Shortcodes
- Surbma | Divi Remove Project CPT
My childthemes for Divi theme:
Divi Plus
Do you want to contribute or help improving this plugin?
You can find it on GitHub: https://github.com/Surbma/surbma-divi-extras
You can find my other plugins and projects on GitHub:
Please feel free to contribute, help or recommend any new features for my plugins, themes and other projects.
Do you want to know more about me?