Настройка анонсов записей, ссылки «читать далее» и тега more wordpress
Содержание:
- Using Text Widgets # Using Text Widgets
- Finding Your Feed URL # Finding Your Feed URL
- Açıklama
- Как сменить тег MORE на уникальный анкор
- Зачем менять тег more
- Reviews
- Açıklama
- Reviews
- Reviews
- Как заменить «читать далее» на своё
- Что значит оформить статью WordPress
- Changelog
- Пожалуйста, помогите c переводом:
- Installation
- Изменить внешний вид кнопки «читать далее» WordPress (тега more)
- Installation
- Images
- Как можно оформить статью
- Как добавлять и использовать теги в категориях (tags)
- Changelog
Using Text Widgets # Using Text Widgets
The Text Widget is one of the most commonly used WordPress Widgets that comes with every WordPress installation. It allows users to add text, video, images, custom lists, and more to their WordPress sites.
To use the WordPress Text Widget:
- Go to Appearance > Customize in the WordPress Administration Screens and click the Widget menu in the Theme Customizer. Or Go to Appearance > Widgets in the WordPress Administration Screens.
- Open the sidebar to which you wish to add the Text Widget.
- Find the Text Widget in the list of Widgets.
- Click and drag the Widget to the spot you wish it to appear.
To open and edit the Text Widget:
- Click the down arrow to the right of the Text Widget title.
- Set the Text Widget Title (optional).
- Add the text or HTML code to the box or edit what is currently there.
- Choose the option to Automatically add paragraphs to wrap each block of text in an HTML paragraph tag (recommended for text).
- Click Save to save the Text Widget.
- Click Close to close the Text Widget.
- Switch tabs in your browser and preview the results and make changes if necessary.
The Text Widget can hold a variety of HTML, XHTML, and multimedia links and players such as video and object embeds.
Adding Code to the Text Widget
Basic HTML, embeds, and JavaScript are added easily to the WordPress Text Widget. Most embed codes from social sharing sites for multimedia will work in a WordPress Text Widget. However, active code and programming languages such as PHP will not work as the Widget will strip out code it cannot display.
To add active code to the Text Widget, use one of the many WordPress Plugins from the WordPress Plugin Directory that override WordPress restrictions on using PHP in posts. Check that they will work on Widgets as some will not.
Finding Your Feed URL # Finding Your Feed URL
There are times when you want to tell someone your site’s feed address or URL, or you need it to submit it to search engines and directories, many of which now accept feed URL submissions. There are four possible URLs for each of your feeds. Any of these will work.
If you are using custom permalinks, you should be able to reach them through this usage:
Your site has feeds for all comments on the site, and each post has its own comment feed.
Permalink format:
Default format:
Permalink format:
Default format:
Categories and Tags
You can also provide feeds to only specific categories or tags on your site by adding the following to the end of the link:
You can include posts from one of multiple categories or tags in a feed by comma-separating their values. For example:
You can include posts from all of multiple categories or tags in a feed by adding to the end of the link. For example:
You can exclude categories from the feed by using something like this:
Older versions of WordPress used a format such as but this has been deprecated in newer versions.
Açıklama
So you want to show more content but not affect users experience?
I got you covered!
My plugin hides the predefined text, through a shortcode and based on your choice, leaving the remaining one visible to the search engines.
Your readers will be also able to read more content by pressing the ‘Read More’ button, without having the page reloaded.
Once you press “Read more” button, it will expand.
They will also be able to hide it again by pressing the same button, which would have been converted to ‘Read less’.
It works via a shortcode and can be placed everywhere!
You can change its colors through its settings menu!
Simple usage: Your long text
Как сменить тег MORE на уникальный анкор
Подзаголовок прям в стихах получился Здесь тоже все очень и очень просто, даже просто до безобразия, но мало кто это делает, ведь мы не ищем простых путей нам надо посложнее, чтоб мозги закипели. В общем смотрите, открываю тайну. После того как статья готова и Вы определились с местом где будет находиться данный тег, ставим кусор в нужном месте и нажимаем на кнопку в редакторе, смотрите скриншот.
Далее идем во вкладку HTML и ищем тег, смотрите скриншот ниже:
Далее все проще простого, берем и пишем сразу после слова more, свой желаемый уникальный анкор, который будет содержать ключевые слова Вашей статьи. Как видите здесь все очень просто, но мало кто это делает. Вот смотрите, что получилось у меня.
<!--moreКак изменить тег More-->
Вот таким простым способом, можно сделать дополнительную перелинковку, всего лишь написав пару слов в нужном месте. Теперь Вы знаете как изменить тег More, как сделать уникальный анкор и как улучшить перелинковку, а также сделать Ваш блог отличным от других. Надеюсь что данная статья принесет Вам пользу и новые полезные знания.
Зачем менять тег more
Как Вы уже наверное заметили, в последнее время, в моих статьях уже нет привычного тега «Читать далее». Для чего нужно менять тег more, а для того чтобы Ваш блог не был похож на все остальные . Но и не только для этого. С помощью данного тега, можно делать уникальный анкор ссылки, который будет содержать ключевые слова нашей статьи, тем самым улучшается перелинковка. А хорошая и грамотная перелинковка, как известно, творит чудеса и уже давно все знают, что правильная перелинковка может дать отличные результаты и обеспечить дальнейший рост позиций Вашего блога. Так что не стоить этим пренебрегать, тем более сделать это очень просто.
Reviews
http-equiv=»Content-Type» content=»text/html;charset=UTF-8″>lass=»plugin-reviews»>
Très satisfaite de ce plugin ajouté à mon site, facile à installer et à gérer grâce au css incorporé. Merci.
The plugin works fine. If you could enter the function to go directly to the desired page (for example: page 80, typing the number 80 in a field), it would be perfect.
It is very helpful.
I have been using this plugin for some time now and am really satisfied.
thanks
Easy to set up, easy to adapt the styling. Works great on the archive and search pages. Unfortunately I could not get it to work on my standard post pages, but that is probably an issue with my theme, Dorian by Edge, as the theme pagination also does not work: worse, it actually breaks the page when activated. Which Paginate does not do, so that is still an improvement
No problems to use!
Açıklama
Read More is the best wordpress Read More plugin to help you show or hide your long content.
With the help of Read More plugin you can make website with long content more beautiful. The part of the page you don`t want to see immediately,will be hidden after inserting it in the short code and will open by clicking the button.
Use it to toggle (show/hide) blocks of text, by inserting a simple shortcode:
Read More by Edmon is a WordPress plugin that allows you include text which won’t be visible to users unless they press “Read More” button.
Its purpose is to boost your SEO and your visitors’ experience, by allowing you to include tons of data readable by search engines, without affecting your visitors in a negative way.
How to create read more popup example
How to create read more button
** Read more – Features: **
- Button type
- Inline Type
- Link button type
- Link type
- button dimension mode
- button width – button custom dimension
- button height – button custom dimension
- button auto mode padding
- Font size – button custom font size
- Expand animation duration – Expand custom animation duration
** Read more – PRO features: **
- button background color – custom color.
- button font family – button font family from google fonts.
- button color – button text custom color.
- button border radius – button border radius.
- button horizontal alignment – button horizontal alignment.
- button vertical alignment – button vertical alignment.
- button vertical alignment – button vertical alignment.
- more only on mobile devices – after activating this option, Read more will be shown only on mobile devices.
- button background color on hover effect – after mouse hover effect read more button change background color.
- button text color on hover effect – after mouse hover effect read more button change text color.
- Auto open
- Popup type
- Popup width
- Popup height
- Popup max width
- Popup max height
- Popup initial width
- Popup initial height
- Popup show close button
- Popup dismiss on overlay click
- Popup dismiss on esc key
- Popup overlay color
- Popup content color
- Popup content padding
- Login adn Registration forms
Shortcode example:
Hidden text
Reviews
http-equiv=»Content-Type» content=»text/html;charset=UTF-8″>lass=»plugin-reviews»>
If you want to have photos on all your categories, this is a great little plugin.
If you want some of your categories without photos though, instead of a blank space you get a broken image on the page, which isn’t ideal, hence only 4 stars.
Thank you
Quick turn around time & flexible. I have used this plugin for two different websites & all are working nice. Finally used with WP-4.9.4
Thank you Zahlan for this awesome gift.
Buen pluggin y la documentación bien explicada
I do not recommend this plugin because it’s not well coded and it well crash your site it took 1.7 second to get image for a category so with large data set it will take a large amount of time.
This plugin is great and lightweight. The code is clean and you can use it easily. Thank you.
Reviews
http-equiv=»Content-Type» content=»text/html;charset=UTF-8″>lass=»plugin-reviews»>
I like this plugin because it gives website visitors a reason to stay longer, and the themes it comes with look beautiful and in harmony with the theme.
I have an issue with the text-decoration after the latest update, only because I tweaked the css in the plugin editor, and now I can’t remember the line of code that I changed!
A great, useful plugin highly recommended!
PS: I will seek support for my little problem, and hopefully I can fix it!
Been using this plugin for several years on a blog site — it’s regularly maintained and the support is excellent.
The plugin is great and support is great! Highly recommend.
Excellent support! Thank you.
so many features in free
Thank you very much for this plugin. Not only that it’s working great I also have to mention that it’s made of a beautiful design. Everything (Setting, Configuration, Frontend) looks absolutely amazing. You made this with style! <3
Как заменить «читать далее» на своё
Извините, сначала хочу небольшое предисловие сделать, а затем уже перейдем к тому, как изменить «more». Для не терпеливых предлагаю сразу перейти непосредственно к пункту — .
Некоторые умельцы настолько меняют внешний вид темы, что не остается почти ни следа от старой версии.
В этом есть какой-то смысл: как утверждают многие бизнес-эксперты, для посетителей в первую очередь важно удобство навигации по сайту и содержание контента — ведь он пришел за информацией. И лишь потом оценивается внешний вид
Я с этим не вполне согласна и считаю, что внешнему виду тоже следует уделять внимание
И все-таки остается неоспоримым фактом, что посетителей на сайте удерживает ценность информации, именно поэтому сайты, не нагружающие ярким дизайном, имеют высокую популярность в интернете.
Многие успешные вебмастера не тратят время на поиск идеального или уникального (даже платная тема далеко не уникальна) шаблона (по своему опыту знаю, что эта история может затянуться на бесконечное время), а сосредотачивают силы на быстром запуске проекта, создании своих продуктов, обучении, наполнении контентом и продвижении. А шаблон для сайта — уникальный, свой, любовно сделанный на заказ — можно всегда сделать.
Если к хорошему контенту добавить собственные фишки и приятный дизайн, который передает общий дух блога, то получится полная гармония. Даже если у Вас бесплатный шаблон, сайту можно придать личную ауру и своеобразие, внеся даже незначительные изменения.
Как изменить «читать далее» или «more» на свое
Когда мы пишем статью, то используем тег more, чтобы ограничить анонсом показ статьи на главной в ленте блога. Визуально это тег преобразуется в слова вроде «читать далее«, как это было в моем шаблоне. Меняется очень быстро.
- Заходим в админпанель сайта.
- Внешний вид — Редактор.
- В правой колонке редактора находим «Основной шаблон (index.php)» — он нам и нужен.
- Через Ctrl+F находим слова «читать далее» или, в некоторых случаях «more», и вписываем то, что хотелось бы увидеть вместо них.
- Не забудьте сделать копию содержимого файла перед изменением, чтобы можно было восстановить, если что то пойдет не так, а затем, после изменений обновить файл.
- Переходим на сайт и любуемся творчеством.
В своем блоге заменила «читать далее» на «текст целиком». На большее пока фантазии не хватило, но Вы, наверняка, придумаете что-нибудь поинтереснее. Блоггинг такое дело.. Хочется все до мелочей под себя сделать.
Если хотите что-нибудь еще:
Что значит оформить статью WordPress
С точки зрения пользовательской эстетики, а также юзабилити статьи и оптимизации, под оформлением статьи я понимаю следующее.
- В статье должна быть, минимум одна фотография, с тегом alt;
- Статья должна быть разбита на параграфы по 5-6 смысловых предложений;
- Параграфы статьи нужно объединить в смысловые разделы с заголовками;
- Заголовки разделов должны быть выделены тегами HTML h2-h3-h4, имеющими древовидную подчиненность;
- При необходимости важный текст должен быть выделен жирным шрифтом, курсивом, цветом или подчеркиванием (не увлекаясь);
- В текст могут быть добавлены цитаты;
- В статье должны быть внутренние и внешние ссылки.
Всё это и есть оформление статьи, и оформить статью WordPress можно коробочными инструментами системы.
Changelog
2.0.0
- Added new button styles
- Added the ability to select the font
- Updated the translation file
- Added the ability to add pagination without editing theme files. This applies to posts but not to comments.
- Added the ability to hide the standard theme pagination. This applies to posts but not to comments.
- Added a review notice
= 1.3.4=
* Tested with WordPress 4.7.1
1.3.1
- Fixed bug that prevented a wp-paginate.css stylesheet from loading from a child theme (reported by sunamumaya)
- Tested plugin against WordPress 4.1
1.3
- Plugin ownership transfered to Studio Fuel (http://studiofuel.com) – no functional changes were made
- Tested plugin against WordPress 4.0.1
1.2.6
- Removed final closing PHP tag
Github pull request via DeanMarkTaylor - Do not add the title element if the title is empty
Github pull request via Claymm / chaika-design
1.2.5
- Remove PHP4 support to resolve PHP Strict warning
Github pull request via DeanMarkTaylor - Test with latest version of WordPress
1.2.4
- Ensure pagination of posts when wp_paginate() is called
Github pull request via whacao - Support loading on https pages (plugin now requires WordPress 2.6+)
Github pull request via hadvig
1.2
- Added RTL language support
- Fixed comments pagination bug
- Changed language domain name from wp_paginate to wp-paginate (this will affect translation file names)
- Fixed comment pagination bug (nested comments caused blank page)
- Enabled HTML for Pagination Label, Previous Page, and Next Page
- Localization changes were made, Translations need to be updated
- Added I18n folder and wp-paginate.pot file
- Fixed some internationalization and spelling errors
- Updated readme.txt and added more details
Пожалуйста, помогите c переводом:
1. Lol when @hartdenton develops his coachella polaroids
2. Usting @melton as my bitch for gueen
3. Trying to pack for LA
4. Fresh nails wha dis
5. Me once my motor cycle license is done this summer
6. So cute
7. The detail. . . even down to my snake rings. . . Amazing!
Английский-Русский
1. The ENIAC (1943-1946) The first all-electronic computer, the Electronic Numerical Integrator and Calculator (ENIAC) was developed at the Moore School of Electrical Engineering of the University of Pennsylvania. It was developed as a result of a military need. J.Presper Eckert and John Mauchly proposed the machine to solve the problem of calculating firing tables for new weapons. The ENIAC weigh
Английский-Русский
(8) 4 ÷ 2 are divided into 5 steps
(a) Correct quotient
(b) Over-quotient by once
(c) Over-quotient by twice or more
(d) Same first digits (2 scenarios)
(e) Both first digits are 1 over-quotient (129, 348, 567, 786, 95)
(f) Line to help memorize returning : minus 1 time, skip a space and add back Mr. Cat
Английский-Русский
Mendeleev was foreshadowed in his great generalization by De Chancourtois’s helix of elements of 1863, J.A.R. New-lands’s *law of octaves* (1864-5)-which uncovered periodicity in the 8th elements of his chemical groupings — and W. Odling’s work, which suggested that recurrent chemical properties in elements arranged according to atomic weight could not be accidental.
Английский-Русский
Installation
Install and Activate
- Unzip the downloaded WP-Paginate zip file
- Upload the folder and its contents into the directory of your WordPress installation
- Activate WP-Paginate from Plugins page
Implement
For posts pagination:
* Open the theme files where you’d like pagination to be used. Depending on your theme, this could be in a number of files, such as , , , , , or the file(s).The theme places the pagination code in in the function.
Examples:
For the theme, in , replace:
With:
For the theme, in , replace:
With:
For the theme, in , replace:
With:
For comments pagination:
1) Open the theme file(s) where you’d like comments pagination to be used. Usually this is the file.
2) Replace your existing and code block with the following:
Configure
1) Configure the WP-Paginate settings, if necessary, from the WP-Paginate option in the Settings menu
2) The styles can be changed with the following methods:
- Add a file in your theme’s directory and place your custom CSS there
- Add your custom CSS to your theme’s
- Modify the file in the wp-paginate plugin directory
Note: The first two options will ensure that WP-Paginate updates will not overwrite your custom styles.
Upgrading
To 1.1.1+:
Изменить внешний вид кнопки «читать далее» WordPress (тега more)
Если вы хотите оформить ссылку «читать далее» в виде кнопки, необходимо отредактировать файл темы styles.css. Найдите в нем класс «.more-link», если такого нет, то просто допишите один из приведенных кодов в конце.
Как всегда приведу несколько примеров с комментариями к коду
1. Кнопка как у меня
1 2 3 4 5 6 7 8 9 10 11 12 13 |
.more-link {
 background none repeat scroll   #00B37C; /*цвет фона */
 border 1px solid #62901E; /*толщина и цвет границ */
 border-radius 5px; /*закругленные края */
 color #FFFFFF; /*цвет шрифта */
 display block;
 font-family verdana;
 font-size 12px;
 line-height 12px;
 padding 8px 14px;
 text-decoration none;
 text-transform uppercase; /*текст в верхнем регистре */
}
|
2. Плоская кнопка
1 2 3 4 5 6 7 8 9 10 11 |
.more-link {
 background none repeat scroll   #E81D1D;
 color #FFFFFF;
 display block;
 font-family verdana;
 font-size 12px; /*размер шрифта */
 font-weight bold; /*жирный шрифт */
 line-height 12px;
 padding 8px 14px; /*внутренние отступы */
 text-decoration none;
}
|
3. Кнопка с тенью и градиентом
1 2 3 4 5 6 7 8 9 10 11 12 13 14 15 16 17 18 19 20 21 22 |
.more-link {
 background linear-gradient(#DD1D1D, #A61518) repeat scroll   rgba(, , , ); /*градиент */
 border-radius 4px;
 box-shadow  1px 2px  rgba(, , , 0.7); /*тень */
 color #FFFFFF;
 font-size 16px;
 font-weight bold;
 height 40px;
 line-height 40px;
 text-align center; /*выравнивание по центру */
 width 155px; /*ширина кнопки */
 /* кроссбраузерность: */
 background -ms-linear-gradient(#DD1D1D, #A61518); /* IE10 */
 background -webkit-gradient(linear, left top, left bottom, color-stop(0%, #DD1D1D), color-stop(100%, #A61518)); /* Safari 4+, Chrome 2+ */
 background -webkit-linear-gradient(#DD1D1D, #A61518); /* Safari 5.1+, Chrome 10+ */
 background -o-linear-gradient(#DD1D1D, #A61518); /* Opera 11.10 */
 filter progidDXImageTransform.Microsoft.gradient(startColorstr='#DD1D1D', endColorstr='#A61518'); /* IE6 & IE7 */
 -ms-filter "progid:DXImageTransform.Microsoft.gradient(startColorstr='#DD1D1D', endColorstr='#A61518')"; /* IE8+ */
 -moz-border-radius 4px; /* Firefox */
 -webkit-border-radius 4px; /* Safari, Chrome */
 -khtml-border-radius 4px; /* KHTML */
}
|
Installation
Please make sure your site meets the before proceeding.
Automatic installation
- Log in into your WordPress dashboard.
- Go to Plugins > Add New.
- In the “Search Plugins” field, type in WordPress Popular Posts and hit Enter.
- Find the plugin in the search results list and click on the “Install Now” button.
Manual installation
- Download the plugin and extract its contents.
- Upload the folder to the directory.
- Activate the WordPress Popular Posts plugin through the “Plugins” menu in WordPress.
Done! What’s next?
- Go to Appearance > Widgets, drag and drop the WordPress Popular Posts widget to your sidebar. Once you’re done configuring it, hit the Save button.
- If you have a caching plugin installed on your site, flush its cache now so WPP can start tracking your site.
- If you have a plugin that minifies JavaScript (JS) installed on your site please read this FAQ:
- If you have a security / firewall plugin installed on your site, make sure you so it can start tracking your site.
- Go to Appearance > Editor. Under “Templates”, click on and make sure that the tag is present (should be right before the closing tag).
- (Optional but highly recommended) Are you running a medium/high traffic site? If so, it might be a good idea to check these suggestions to make sure your site’s performance stays up to par.
That’s it!
USAGE
WordPress Popular Posts can be used in three different ways:
- As a widget: simply drag and drop it into your theme’s sidebar and configure it.
- As a template tag: you can place it anywhere on your theme with .
- Via shortcode, so you can embed it inside a post or a page.
Images
SlideshowSlideshow GalleryModal ImagesLightboxResponsive Image GridImage GridTab GalleryImage Overlay FadeImage Overlay SlideImage Overlay ZoomImage Overlay TitleImage Overlay IconImage EffectsBlack and White ImageImage TextImage Text BlocksTransparent Image TextFull Page ImageForm on ImageHero ImageBlur Background ImageChange Bg on ScrollSide-by-Side ImagesRounded ImagesAvatar ImagesResponsive ImagesCenter ImagesThumbnailsBorder Around ImageMeet the TeamSticky ImageFlip an ImageShake an ImagePortfolio GalleryPortfolio with FilteringImage ZoomImage Magnifier GlassImage Comparison Slider
Как можно оформить статью
Для оформления статьи будем использовать, только возможности редактора системы, установленного по умолчанию. Никаких дополнительных плагинов НЕ ставим.
Разделение статьи на параграфы
Не рекомендую писать тексты непосредственно в редакторе сайта. Поясню почему. Редактор WordPress настроен так, что периодически автоматом сохраняет копии статей даже в режиме редактирования. Это значит, что во время написания статьи в редакторе она сохранится не один десяток раз, что не нужно для нагрузки на базу данных, не нужно для накопления копий ревизий статей.
Поэтому, статью нужно писать в специальных текстовых редакторах типа Word, проверять там грамматику и вставлять на сайт готовый текст статьи.
При вставке статьи из редактора Word, система WordPress очистит специальную разметку Word редактора, но оставит списки, выделение, курсив.
Если тебе нужно полностью очистить форматирование вставляемой статьи, например, ты скопировал цитату с другого сайта, в редакторе есть кнопка «ластик» — очистить форматирование.
Кнопка очистить форматирование текста
Для разбиения текста статьи на параграфы НЕ нужно переходить в текстовой редактор и использовать знания html. Достаточно делать простой перенос текста на клавиатуре, кнопкой «Enter».
Параграф в визуальном редакторе
Для контроля разметки всегда можно перейти в текстовой редактор, кнопкой «Текст». Правда и здесь вы не увидите тегов параграфа <p>, но увидите все другие теги html.
Параграф в текстовом редакторе
Выделение подзаголовков разделов h2-h4 (SEO разметка)
SEO или оптимизированная разметка текста предполагает смысловое разделение статьи на разделы с заголовками h2 и подзаголовками h3, h4.
Теги h1-h2-h3-h4 это HTML теги, указывающие поисковым роботам смысловую разметку текста. Тег h1, в теле статьи использовать НЕ нужно. Начинать нужно с тегов h2.
В редакторе WordPress это можно сделать кнопкой «Оформление». Просто выделяешь нужный текст, и выбираешь на кнопке «Оформление» нужный тег.
оформление заголовков и подзаголовков в статье
Добавляем фото
В статье должно быть фото, это правило оптимизации. С добавлением фото в редакторе WordPress полный порядок.
Чтобы добавить в статью фото, есть кнопка «Добавить медиафайл». Нажмем на неё и посмотрим, что она может.
кнопка «Добавить медиафайл»
В системе три возможности добавить фото:
- Из медиабиблиотеки. Доступно любое фото из ранее загруженных в библиотеку, для поиска есть фильтр по имени.
- С локального компьютера.
- Из любого хранилища файлов по URL картинки.
Оформить статью WordPress фотографией
Стоит отметить, что система ограничивает размер загружаемого в библиотеку файла, настройками вашего сервера в файле php.ini. Обычно это 64 МБ.
Для вставляемого в статью фото можно:
Задать любой размер на настройке размера «Произвольно», или использовать быстрые размеры оригинал, большой, средний и миниатюра, по параметрам, выставленным в настройках Общие>>>Медиабиблиотека.
Вкладка параметры изображения
Указать ссылку для фото из вариантов:
- Нет (убрать ссылку);
- Медиафайл (для модального окна);
- Произвольный URL (любая ссылка, в том числе, внешняя);
Можно дать фото подпись.
Обязательно нужно дать альтернативное название фото. Это будет тег alt в HTML картинки.
Есть дополнительные настройки, их используют по желанию, для создания специального оформления.
Кнопки быстрого редактирования фото
Обрати внимание: Через кнопку медиафайлы в статью можно добавлять, видео, аудио файлы, а также создавать галереи из фотографий
Важно! Все фото, добавленные в статью из редактора, прикрепляются к статье. Об этом появляется отметка в медиабиблиотеке. Из прикрепленных статей можно создавать галереи в любом месте статьи специальными шорткодами
Об этом появляется отметка в медиабиблиотеке. Из прикрепленных статей можно создавать галереи в любом месте статьи специальными шорткодами
Важно! Все фото, добавленные в статью из редактора, прикрепляются к статье. Об этом появляется отметка в медиабиблиотеке. Из прикрепленных статей можно создавать галереи в любом месте статьи специальными шорткодами
Примечание: шорткод (shortcode) WordPress это набор функций из Shortcode API (появился в WP 2.5.) вызываемых специальными кодовыми фразами, заключенными в квадратные скобки.
Страницы категорий и их метки воспринимаются многими как повторный контент, от которого просто избавляются. Но если добавить описание категорий, то такой подход позволяет привлечь дополнительное количество посетителей на сайт. Если у вас на сайте имеются, к примеру, обзоры автомобилей, то пользователь незнакомый с WordPress сразу увидит это описание. Проще говоря, описание категорий нельзя назвать контентом, который повторяется.
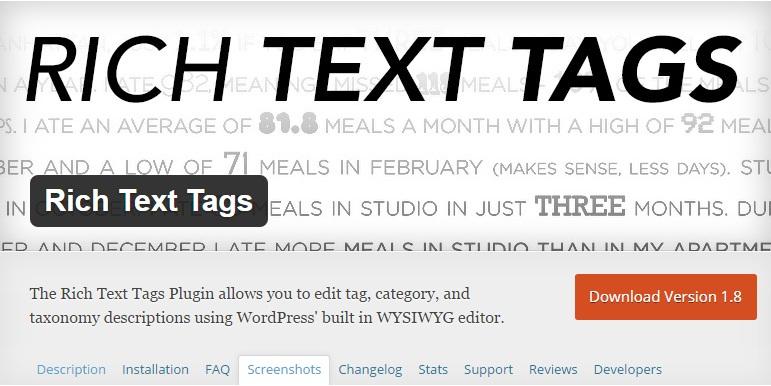
Для добавления какой-либо метки (тега), необходимо зайти в раздел «Записи» и выбрать пункт «Метки». Перед вами откроется поля для названия, ярлыка и описание. По дефолту поля будут обычным полем по типу textarea для html формы. Чтобы у вас появилось больше возможностей, рекомендуем поставить плагин Rich Text Tags, который дает возможность добавить дополнительные теги по типу «more», но и поддерживает таксономию и категорию. Скачать плагин можно по URL: rich-text-tags
После установки плагина размещать текст станет более удобно, ведь появится выделение жирным, подчеркивание и прочие эффекты. Этот плагин также может быть полезен, когда вы делаете сайт своему заказчику, на который необходимо добавить описание. Пользователи сайта в любом случае оценят функциональный редактор вместо стандартного поля ввода.
Теперь необходимо заставить этот текст показываться. Для этого применяйте функцию tag_description, которая имеет синтаксис:
ID тега – это и есть тот тег, который необходимо вывести в категории. Если же никакой параметр не будет задан, то будет отображен текущий выбранный тег. Впрочем, это нам и нужно. Заметим, что сама функция не выводит описание, а только лишь отдает его, поэтому:
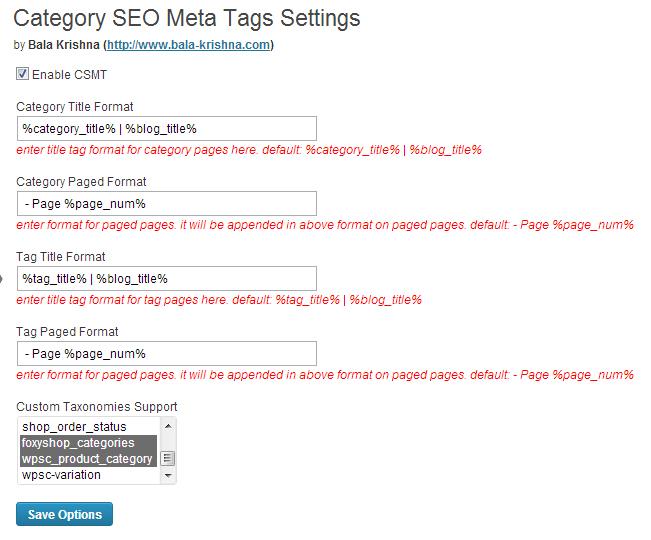
В завершение ко всему этому не будет лишним добавить МЕТА-теги, т.е. тайтл, дискрипшен и ключевые слова. Для этого можно задействовать плагин Category SEO Meta Tags, который доступен по URL: http://kirik.com.ua/wordpress-plugin-optimizaciya-rubrik-i-tegov/. После загрузки и запуска плагина, вы сможете добавлять title, descriptions и keywords в соответствующем разделе.
Changelog
2.5.4
- After activation redirect to plugin menu section
- Show Read More Open JS Trigger Event
- Show Read More Close JS Trigger Event
2.4.5
- More button CSS class name yrm-more-button-wrapper
- Less button CSS class name yrm-less-button-wrapper
- Video Tutorials sub menu
- Admin side improvements
2.3.7
- Link button type shortcode URL attrube Ex. [expander_maker id=”1″ more=”Read more” url=”https://www.google.com/”]
- Link button Redirect to new tab new option
2.3.0
- Custom css (new)
- Inner content Width (new)
- Hidden content Font family (new)
- Hidden content Background image (new)
- Bug fixed
2.2.8
- Removed ” Add button to the next of the text ” option from the button type
- Add videos
- Settings section improvement
- Uninstall bug fixed
- Options improvement
2.2.1
- Hide button after click more text (new option)
- Show content gradient (new option)
- Show content gradient Height (new option)
- Show content gradient Position (new option)
- Show content gradient Background color (new option)
- Did improvement Show on selected devices option
- Bug fixed related to Scripts load to page
2.1.9
- Read more styles render improvement
- Fixed compatibility with Divi Builder
- Admin side improvement (copy read more shortcode)
2.1.4
- Remove Settings after uninstallation
- User role who can use plugin
- On of logic
- Button border (pro)
- Box shadow (pro)
- Bug fixed
2.0.9
- Button font weight (new)
- Button 5 new fonts (new PRO)
- hidden content text color (new PRO)
- hidden content background color (new PRO)
- popup overlay color (new PRO)
- popup content color (new PRO)
- popup content padding (new PRO)
- Bug fixed
- Code improvement
2.0.0
- Changed admin dashboard
- Unlimited read more button
- Beckend and frontend functionality chnages
- hover text color (pro)
- hover background color(pro)
1.1.9
- short code improvement now you can use short code like this Hidden text
Where default more = “Read more” and less = “Read less”. - code improvement
1.1.7
- multiple values for example
Hidden text
Hidden text - Bug fixed